Hey everyone, it’s Jim, welcome to my recipe page. Today, I will show you a way to make a special dish, salmon, pea and arugula risotto. One of my favorites food recipes. For mine, I am going to make it a bit tasty. This will be really delicious.
Break the salmon up into large chunks, removing any skin or pinbones. Add the salmon to the risotto, along with the arugula, peas, and lemon zest. You don't want to break up the salmon too much.
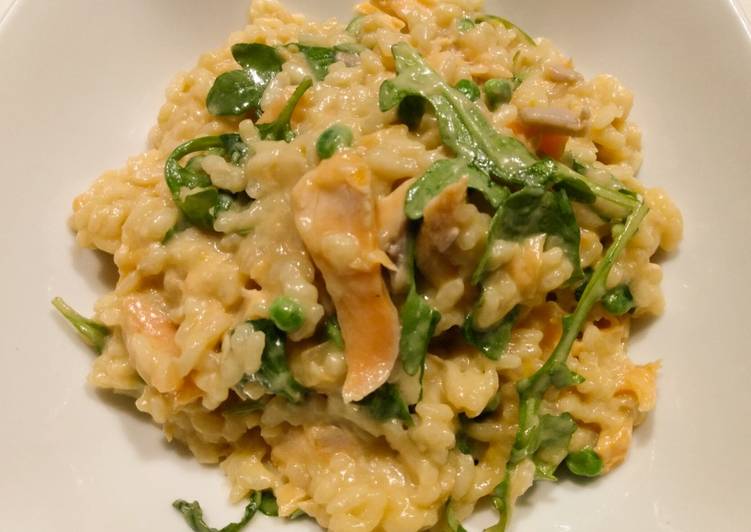
Salmon, pea and arugula risotto is one of the most favored of recent trending foods in the world. It’s appreciated by millions daily. It’s easy, it is fast, it tastes delicious. Salmon, pea and arugula risotto is something which I’ve loved my entire life. They are nice and they look wonderful.
Simple Way to Make Salmon, pea and arugula risotto
To begin with this recipe, we must first prepare a few components. You can have salmon, pea and arugula risotto using 9 ingredients and 5 steps. Here is how you can achieve that.
Ingredients
The ingredients needed to make Salmon, pea and arugula risotto:
- Get 350 g salmon fillet
- Take 5 cups vegetable or fish stock
- Get 1 large shallot, finely chopped
- Get 1 clove garlic, minced
- Make ready 2 cups arborio rice
- Take 1 tbsp cream cheese
- Get 1/2 cup baby arugula
- Take 1/2 cup frozen sweet peas
- Make ready Zest of 1 lemon, finely grated
Meanwhile poach the salmon in a little vegetable stock. Then cook the peas according to the packet instructions. Now add the salmon, peas and stock from poaching the fish to the risotto. Heat the oil in a heavy-based frying pan placed over a medium heat.
Instructions
Steps to make Salmon, pea and arugula risotto:
- Heat a splash of veg oil in a medium pan. Season the salmon with salt and fry it for 4 minutes per side. You want the salmon just slightly undercooked. It'll finish in the risotto. Remove the fish to cool.
- Put the stock in a small pot and keep it at a bare simmer. In a medium pot, heat a few tbsp extra virgin olive oil over medium heat, then add the shallot and garlic. Cook for 1 minute until fragrant.
- Add the rice to the pot of shallot and garlic. Stir for 2 minutes until all the grains are shiny and coated with oil.
- Stirring continually, add the stock to the rice a ladle at a time. Allow the liquid to absorb before adding the next ladleful. Stop adding stock once the rice is cooked (about 20 minutes). The risotto should be smooth, creamy, and just slightly runny. Add the cream cheese and stir until blended. The risotto will thicken. If it gets too clodgy, add a splash of stock. Add salt and cracked white pepper to taste.
- Break the salmon up into large chunks, removing any skin or pinbones. Add the salmon to the risotto, along with the arugula, peas, and lemon zest. Fold everything together carefully. You don't want to break up the salmon too much. Serve warm.
Add the rice and stir well to coat in the oil. This salmon and pea risotto recipe is great for the whole family. Salmon risotto is always a winner, and this one uses fish and sweet peas from the freezer! This salmon and pea risotto recipe is great for the whole family. Salmon risotto is always a winner, and this one uses fish and sweet peas from the freezer!
As simple as that Simple Way to Make Salmon, pea and arugula risotto
So that is going to wrap this up with this special food salmon, pea and arugula risotto recipe. Thanks so much for your time. I’m sure that you can make this at home. There is gonna be interesting food in home recipes coming up. Don’t forget to save this page on your browser, and share it to your loved ones, friends and colleague. Thanks again for reading. Go on get cooking!
Print this page